itch.io library
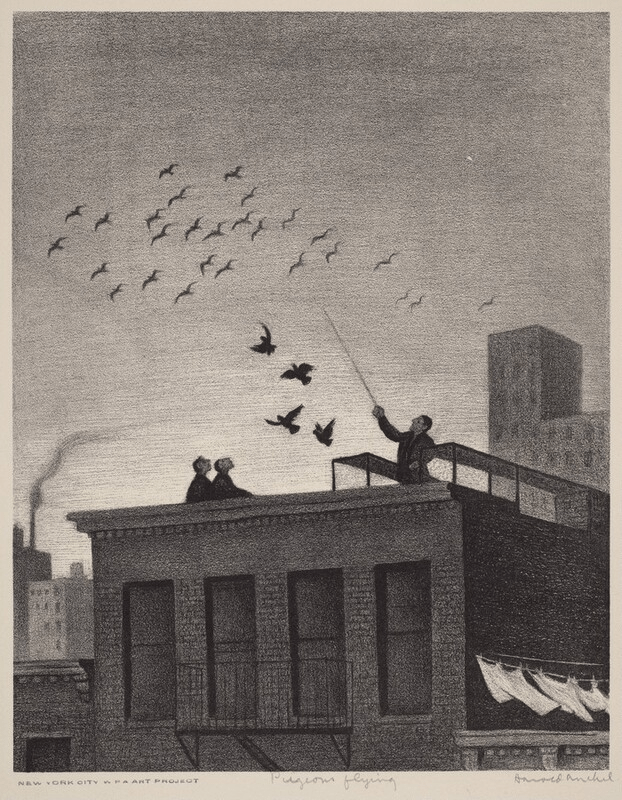
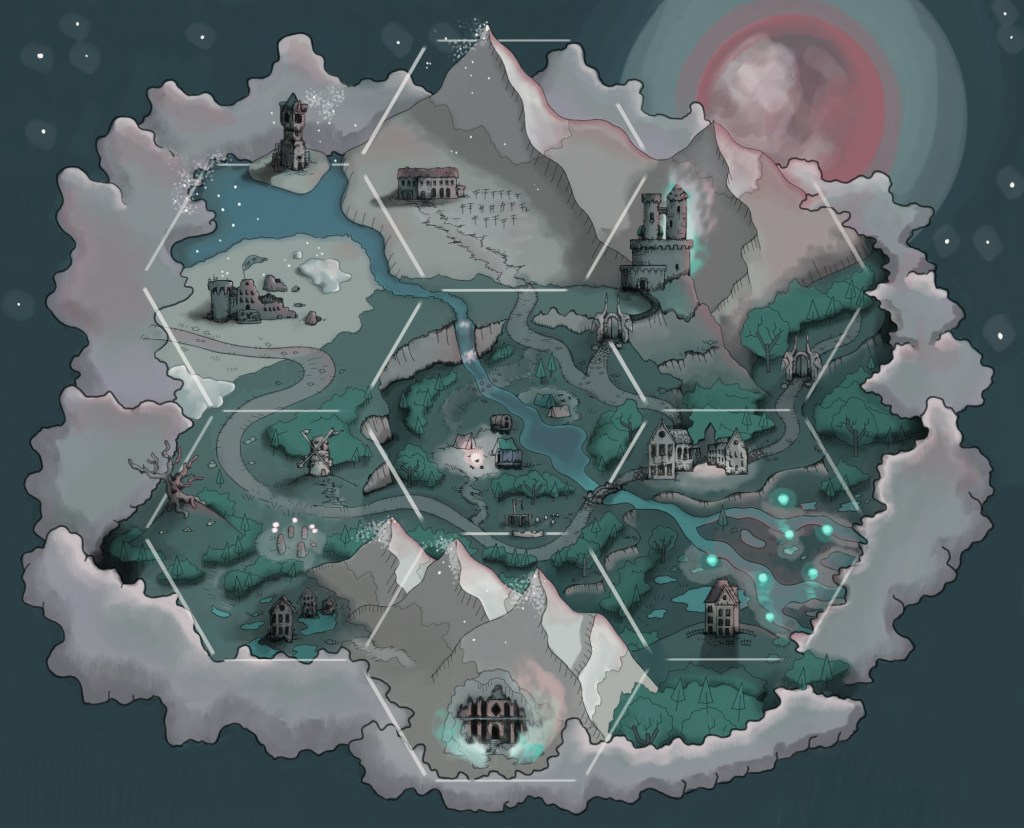
  • Session 2 of the Gloaming opens on six Level 2 PCs marching through the mist-addled forest on their way to Bittermold Keep.

    Leading the way is Yarknig, goblin priest of Shune the Vile. Shune whispers of a ruby gifted to the late Lord Bittermold by a powerful demon: the Cloven Heart. Behind her is the tree-faced, mutant warlock Ipshoom. He scans the forest, crossbow raised, looking for the source of the ululating cries mentioned by the hunters. Whatever is down there will soon fear the Willowman. The curious halfling wizard Hald Frogley stumbles over a gnarly root, tucks in his shirt, and jogs to join the others.

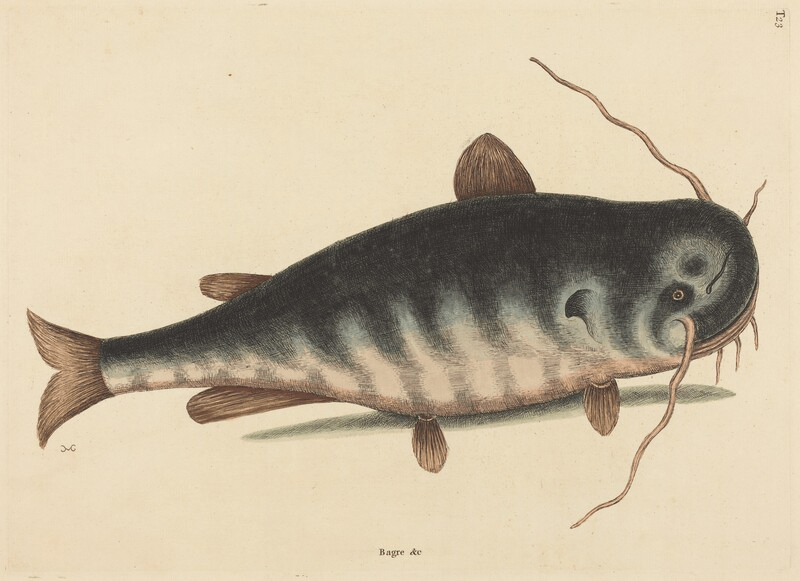
    Three half-orcs watch the rear: Grant, warlock of Shune, once heard a fisher’s tale of a legged catfish that tore out its own hook; Trogrug, a traitorous Knight of St. Ydris, chose this expedition over the noose; and Auglud, a tuskless knave determined to stop Mugdulblub simply because she hates bullies.

    The PCs search the dissolving masonry on the hill until they find a rusted trapdoor and a set of warped stairs into darkness. Below are two halfling barbarians with sharpened teeth: Howlers. They don’t want a fight. They’re glad the PCs aren’t sneaky Bittermolds.

    “We don’t know why we’re here,” one begins. “Gordrock’s gone insane-”

    His partner cuts him off with a backhand. “Do not insult Gordrock! He is the best of us!”

    The Howlers point out a dark, wet hole in the cracked masonry in the south corner of the room. That’s where the Bittermolds crawl out. That’s what the Howlers are guarding. The players are suitably creeped out but opt to look around before meeting with Gordrock.

    They find a body on a floor engraved with a compass rose, a dead Howler. No injuries, but there’s a silver dagger in his hand. The characters poke around a bit while Grant kneels down to pick up the knife. Grant suddenly drops dead.

    Yarknig rushes to his side and whispers a prayer to Shune the Vile. Grant gasps. Life restored.

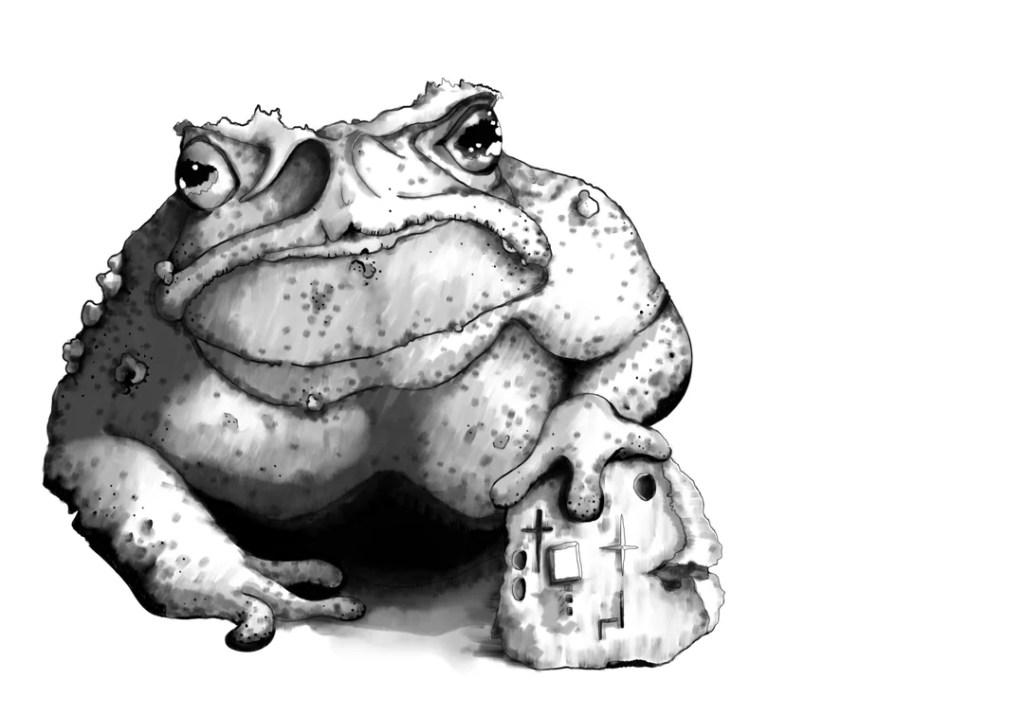
    The dagger is called Wrath Bolt, Grant knows. A magic dagger that is deadly to anyone who tries to take it from its previous owner (dead or alive, apparently).

    Auglud moves north, finding an inexplicably cold room and a bowl of frost-covered ash. The PCs throw the dead Howler onto the bowl, spilling ash but otherwise causing no effect. Trogrug inspects the walls and finds an iron key sewn into the crimson banners.

    The PCs promptly move on to a chamber reeking of rot, its walls riddled with twenty pockmarked holes. Peering into one, they find the source of the stench: a sludgy ichor ooze that slurps out, drawn to the warmth of their torchlight. The characters sling spell and steel. Trogrug’s axe melts under the corrosive spray, but the creature is reduced to a bubbling puddle. When another ooze begins to emerge, the party bolts for the next room and slams the door behind them. Not worth it.

    The next chamber holds two fountains: one of pearl, pouring clear water where a five-limbed catfish floats dead; the other of obsidian, spewing milky, acidic runoff. Above them, a warped bas-relief shows a many-fingered man dropping a heart-shaped gem into his mouth. Trogrug deciphers the diabolic script beneath: Lord Bittermold tricks the Demon Tzakoru into handing him the Cloven Heart. Lord Bittermold consumes the Cloven Heart so that even in Death Tzakoru cannot reclaim that which he so desires.

    Ahead, the PCs hear hushed, snarly voices on the other side of the door. There’s flickering torchlight through the crack beneath. Howlers, no doubt.

    The characters decide it’s time to finally meet with Gordrock. They convince the halflings beyond the door to show them the way.

    Ten halflings voraciously eat raw catfish around a campfire. One stands taller than the others with a greatsword on his back. It’s Gordrock Breeg, warlock of Kytheros, here to ensure that Mugdulblub dissolves the Gloaming without interference.

    He explains that the Archdemon Almazzat intends to wrest the Sands of Time from Kytheros. That’s why it sends its minions through the cursed black marrow trees. The Gloaming must be dissolved before Almazzat succeeds.

    Trogrug notices diabolic inscriptions in the pillars throughout the room. The smell of brimstone rises as he reads–summoning ritual, he averts his eyes.

    “I was betrayed once by your kind,” Gordrock says, “crawlers looking for treasure. They led the Bittermolds into our camp.”

    Gordrock points to a handcart with the bodies of four slain adventurers wrapped in cloth. “Take these to Mugdulblub, you must not go empty handed. Mugdulblub will grant you boons, then we can talk alliances.”

    As the Howlers dismantle their barricade the PCs show Gordrock the diabolical inscriptions. He slurps algae from his pocket. His veins bulge; his eyes go milky white.

    “Demons… from there.” He points to the shadowed alcoves at the south end of the hall. He orders his Howlers to destroy the inscriptions.

    Yarknig casts light on the handcart, revealing quicksand ahead. Auglud steers it through the narrow corridor to the right, skirting the danger. From ahead come splashing sounds, and something glints in the crystal pool beyond.

    The Gold One, a golden mutant catfish, splashes merrily in the water. He knows everything about Bittermold Keep; he’s been here this whole time…

    In a flashback we see a normal catfish swimming upriver against the current, Bittermold Keep is visible on a hilltop in the distance, its turrets not-yet-dissolved and its crimson banners not-yet-torn. The catfish continues upriver until it disappears into a cave beneath the castle.

    The catfish enters a pool where something dark bubbles up from the earth below. A starry void grows larger in the reflection of the catfish’s eye as it’s bathed in golden light.

    “I was the first to witness Mugdulblub, you see,” says the Gold One smiling. He strokes at his long shimmering beard tendrils.

    The Gold One isn’t scared, he knows a way into the Feywild Kingdom and plans to escape with his many mates before the Gloaming is dissolved. For now he answers questions about Bittermold Keep for 5gp each. He splashes back and forth over a pile of shimmering coins, a growing offering for Titania, Queen of the Fey, who he thanks for his cruel, wonderful existence.

    The PCs ask where to find the Cloven Heart; swallowed by Lord Reginald Bittermold and entombed with his corpse. How to get there? The stairs to the crypts have collapsed, but there’s an illusory wall somewhere in the natural caves that lead directly to the crypts. How can Mugdulblub be stopped?

    “I’m not sure you can,” the Gold One frowns, “but maybe a demon could, a big one like the one that wants the Cloven Heart.

    Now the PCs are set on breaking into the Bittermold tomb and recovering the Cloven Heart. After taking a moment to lay the previous expedition members to rest in the quicksand they are on their way to the caves to find this illusory wall.

    Pushing west into Bittermold territory, the PCs encounter rubbery, lank-haired figures stabbing prisoners in a dark jail. They almost look human, but they’ve adapted to the dark and laugh with a wet, guttural glee.

    The PCs lay caltrops for an ambush and surprise the Bittermolds. The manacled halflings hoot and howl and cheer as the PCs cut down the rubbery, slime-filled figures. Ipshoom eats a fistful of hallucinogenic mushrooms and saves against a bad trip; his senses heightened, he declares his name henceforth to be Ipshroom.

    We ended the session after the characters slaughtered the Bittermolds. They found treasure taken from various prisoners over the years, enough to level up.

    Next week they come face to face with Mugdulblub.

  • Last night my open table started a nine-session Shadowdark RPG campaign set in the Gloaming. The characters began outside Bittermold Keep. I told them “everyone knows that Mugdulblub is dissolving the Gloaming, but it’s happening so slowly that people tend to forget…”

    The Knights of St. Ydris, the de-facto defenders of the Gloaming, are busy losing a war to the demons that hatch from cursed black marrow trees, so if anyone is going to stop this dissolving business it’s the PCs. The Level 1 PCs included 2 witches, a priest, and a thief.

    The PCs surveyed the area around the collapsing keep and decided to take the muddy tunnel upriver into the natural caves below. They saw the dripping, sludge-like walls and the spongey stone pillar imbedded with hundreds of teeth.

    Continuing forward through the narrowing cavern, the PCs stumble into a camp of slimy mutants chewing on cave mushrooms. A boneless figure steps forward and shields his eyes from the PC’s amber torchlight as he explains the fifteen rubbery campers are actually the warped descendants of the Bittermolds.

    The boneless figure, Zalk, suggests the PCs meet the leader of the Bittermolds, Plogrina. She’s meditating on a rug of woven hair, and she tells the PCs that her family has lived beneath Bittermold Keep for generations. They are the only ones suited to serve Mugdulblub but recently, a group of halfling barbarians known called the Howlers have invaded their home to win Mugdulblub’s favor.

    Outnumbered, the PCs agree to bring Plogrina the head of the invading Howler chief, Gordrock Breeg, in exchange for an introduction to Mugdulblub and a powerful boon. Purple slime dribbles from Plogrina’s mouth as she thanks Mugdulblub for her many “gifts,” which the PCs found suitably unsettling.

    Plogrina tells the characters about a hidden tunnel they can use to enter the Howlers camp, and points them in the right direction. Unfortunately, one of the witches is swept away by the rapid, underground river and after the priest dives in to follow her the party is split.

    The other witch and the thief continue forward, but when three mutant catfish emerge from the pool they retreat toward the noise of their allies through the caves.

    After regrouping, the PCs are off-course. They enter a door, take a few turns, and come face to face with four of the sharp-toothed, cayote-pelt wearing halflings: Howlers. The halflings are jumpy, but relieved to see the PCs are not Bittermolds.

    One of the halflings, Clove, agrees to take the PCs to meet Gordrock in their camp. On the way, Clove confides in them that the Howlers don’t know why they are here; Gordrock has gone insane, and some of the Howlers are beginning to whisper mutiny. Before the PCs can get into specifics, they are face to face with Gordrock and a camp of a dozen barbaric halflings.

    Gordrock reaches into his pocket and slurps toxic algae from his hand. The algae gives him visions of the future, a gift from his patron Kytheros the Lord of Time. He says Mugdulblub is destined to dissolve everything, and Kytheros has tasked him with its protection. For this, Gordrock will be rewarded with a single, unending day in his long-gone halfling village.

    The PCs try to rally the Howlers against their leader, asking the room if they are willing to die for Mugdulblub? The halflings scoff at the PCs and continue to devour raw catfish by the fire. The PCs try again, but recognize they are pushing their luck.

    “No one wants to be the first to stand up to Gordrock,” Clove explains later, “he rules by the might of his greatsword.”

    The PCs return to Plogrina empty handed and she is not happy. They say they lack the numbers to fight Gordrock, so Plogrina sends nine of her Bittermolds to join the fight.***

    The PCs lead the Bittermolds into battle but are swiftly cut down by Gordrock and his allies. The Bittermolds suffer a substantial loss, and the players roll up new characters.

    Next week, six Level 2 PCs will delve into Bittermold Keep to follow up on those who never returned.

    Stay tuned.

    *** I explained to my players above table that I didn’t want to run a 13 vs 13 fight (no one wanted that) so I described the Bittermolds and Howlers fighting all around them as the four PCs fight Gordrock and three Howlers in the centre of the room. I told them the outcome of their fight would determine the outcome of the battle as a whole.

    After Action Report

    I tried using the point crawl I had made in advance of this session and while part of me is still attached to this idea, I have resolved always provide a player map for dungeon crawls. The time saved on describing the spatial relationship of rooms and corridors is reason enough for me, but during this session I was reminded of when I ran Scarlet Minotaur and instantly regretted not preparing a player version of the map. For some players, its frustrating (or even impossible) to imagine a physical space without any visual aids. After the TPK, my players told me they felt it was due to their choices, but I’m convinced if the exploration of Bittermold Keep had been easier/more-fun/not-a-drag they would have made different choices and not run head first into a full-scale battle against the Howlers. Maybe.

    Within hours of running the Lost Citadel of the Scarlet Minotaur I got to work editing the map to make a player version I could use if I ever ran the adventure again.
  • The Bell Tower available on itch.io

    One of the things that attracted me to Mausritter was the obvious comedy of playing ultra-serious, politically complex, and thematically dark fantasy stories with mice, rats, and other adorable little critters.

    There’s an inherent level of camp in any TTRPG session that makes them all comedy-slash-the adventure’s intended genre. Even the most vile horror adventures will inevitably lead to laughter at the table.

    I designed this horror adventure for Mausritter about the end of the mundane world. As the Scab (zombie virus) spreads throughout all animals, the owl sorcerer Jupiter has opened a portal to the faerie realm to save as many animals as he can.

    The adventure is intended to be a fast-paced, perilous climb to the top of the tower. The player mice will be competing with other panicked animals trying to survive and will have to contend with some scab-infected critters, all-the-while scab-infected humans reach up from bellow telegraphing certain death for any mouse unlucky enough to fall.

    I hope that you will check out the adventure and let me know what you think.

  • This weekend I visited Montreal for the first time and spent most of it wandering around aimlessly looking at the sites. Overall I was very charmed. At times I was overwhelmed.

    I thought a lot about Electric Bastionland.

    Your Bastion will draw from the city you live nearest to. The first one that you explored alone and felt overwhelmed by crowds. That distant metropolis you always wanted to visit.
    – Chris McDowall, Electric Bastionland

    I thought about the different routes we took, the strange and wonderful encounters we had, and when I got home I decided to work on a Montreal-inspired, mountain borough for Electric Bastionland.

    Of course, this Mountain Borough will be based on a hazy weekend impression of a major city, not the city itself. But I think that’s how the designer intended the game to feel.

    For now, all I have are my routes.

    Subway (to Bastion). Leads deeper into the city, a starting point (or exit).

    Subway & Streetcar. Fast, unreliable, and mostly underground. Easy to get lost. Connects to borough’s underground.

    Broken Gondola & Bike Path. The gondola used to get you up the mountain pretty fast, but now people bike below it.

    Canal. Runs throughout the borough, connects the mountain lake to the coast.

    Highway Tunnel (to Deep Country). A claustrophobic, noisy tunnel lined with crumbling tiles.

    I never made it to the top of Mount Royal in real life, so I can’t say for sure what’s there, but in this borough its an abandoned museum (abandoned because the gondola is broken, of course) and clubhouse for loud youths.

  • For a great one-shot all I really need are three things: (1) a compelling hook, (2) an open-ended problem with no obvious solution, and (3) lots of danger on all sides of the player characters. Bonus points if it all fits on one page.

    The gold standard is Moonbase Blues, which manages to meet all of my criteria. Here’s the pitch: the characters (space truckers) wake up on an unfamiliar moon base with (1) no memory of their arrival, (2) no obvious way to get off of the moon, and (3) a number of eerie astronomy enthusiasts eager for them to stick around and see what’s coming over the horizon in a couple of hours (no spoilers).

    It even fits on single, double-sided piece of paper.

    It was such a great hook I decided to steal it for my own one-shot adventure for Into the Odd.

    This was my second time playing Into the Odd, and when I ran the Iron Coral before I walked away loving the rules but feeling as though the monsters went down too fast to be impactful.

    I made a note to focus on making more threatening monsters for my sophomore outing.

    “I like one-shotting, I don’t like getting one-shot.”
    – a PC, ripped apart by astral cultists

    So, these new characters are heading to Hopesend after hearing about the Iron Coral and hearing about the gold and Arcana inside. They secured passage from Bastion on the Fogburner, an eccentric engineer’s icebreaker. Despite noticing suspicious workers loading a large crate, they have an uneventful first night drifting away from the smog-shrouded city.

    We cut to the characters waking up barricaded within the Captain’s Quarters of the Fogburner with no memory of their journey so far. Carved into the wall (in familiar handwriting, perhaps one of their own): “Escape before you forget again!”

    The Fogburner is trapped in ice, adrift amidst the Polar Ocean. It has been for months.

    So yeah, I stole the concept from Moonbase Blues. But I also stole the setting from the Terror (Season 1) and all the proper nouns from a Cairn adventure I had hoped to run but never found the chance to (the Crypts of Crimson Ice). I even stole the name of a local coffee roast for the titular ship.

    I tend to steal the parts of my game prep I don’t enjoy so I can focus my creative energy on the parts I do enjoy prepping. It’s why I prefer to run pre-published adventures most of the time (that, and because there’s something about it all being written down in a book elsewhere that makes it easier for me to believe in).

    Below you can see my notes for this adventure (they all fit on one double-sided page, by the way).

    In the end, the characters sacrificed themselves to destroy Father Ixtab and end the cycle of forgetting, but only one of them managed to survive and finish his journey to Hopesend.


    The Strong Start
    The characters wake up barricaded within the Captain’s Quarters (1) with no memory of their journey so far. Carved into the wall (in familiar handwriting): “Escape before you forget again!” The Fogburner is trapped in ice, adrift amidst the Polar Ocean.

    1. Captain’s Quarters. Cold and tilted. Dim light filtered through opaque, frozen windows. The room contains a bed, wardrobe, and desk. The door is barricaded from inside.
      *Wardrobe. Captain’s uniform (jacket and hat).
      *Desk. Log detailing uneventful journey for two weeks before crew becomes unreliable, equipment starts to fail, and passengers disappear. Manifest details typical cargo from Bastion (rifles, ammunition, antiquities, pornography) and an iron crate labelled “Ixtab.”
    2. Control Room. Snow drifts beneath shattered windows. Blowing snow swirls around a navigation log left face down open on the tilted floor. Mapping equipment, engine controls, and chronometer are all frozen but otherwise appear undamaged.
      *Navigation Log. The Fogburner took an erratic course. Among the logs are astronomical charts focusing on unfamiliar constellations.
      *Mapping equipment. The Fogburner is far north from Hopesend, deep in the Polar Ocean.
      *Engine controls. Frozen solid. The engine will need to warm up before these controls will work again.
      *Chronometer. Running slightly out of sync. Apparently, it’s been three months since the ship’s departure.
    3. Observation Deck. Polar winds howl across the crooked observation deck, its metal surface now a treacherous ascent. From the top, you glimpse your surroundings through the flurries (map). There’s something half-buried in the snow, and red symbols on the guardrail.
      *Something half-buried. A sextant and Arcana (p. 20)
      *Symbols. Strange runes painted in frozen blood.
    4. Bow. View of frozen ice choppers below and the ocean beyond. It’s early spring. The ice is beginning to thaw.
      *Ice choppers. Covered in a thick layer of ice and snow (one could scale down the exterior hull to access 9).
    5. Stern. Large chunks of ice press tightly against the hull. A trail in the distance leads to the mouth of a dark cave. Frozen steps lead to the lower decks (to 6), and lifeboats are uncovered and filled with snow and frozen bodies.
      *Frozen bodies. d4 frozen husks among the dead!
    6. Hold. Warped, crooked floors. Echoing walls. Piles of pilfered cargo. A large iron crate labelled “Ixtab” radiates an unnatural cold.
      *Pilfered Cargo. Luck roll to find equipment (p. 12).
      *Ixtab. Filled with solid ice. Something has been carved out from its centre, leaving a gaping hole. An Arcana (p. 20) has been left inside among shards of ice. An ice swarm attacks if the Arcana is taken!
    7. Engines. A slanted, frozen labyrinth of seized pistons and fractured gauges. Someone has carved into the walls: “Trust no one, defend the engines.” Harsh whispers echo across the metal.
      *Harsh whispers. The Captain brandishes a flamethrower and a pistol to keep outsiders away from the engines.
    8. Crew Quarters. A network of tilted halls and frozen, ransacked quarters. A frightened passenger raids the kitchen.
      *Ransacked quarters. Check for a wandering encounter. Luck roll for Arcana (p. 20).
    9. Ice Chopper Control Room. A small cave of ice and snow. Light filters in through the gaps between the frozen ice choppers. There’s something crawling in the shadows.
      *Shadows. The Engineer lurks in the shadows. He holds an Arcana (p. 20).
    10. Ice Cave. *DEX Save while crossing the ice or foot plunges into the frigid water (d4 DEX damage). A dimly lit cave hollowed from the ice. A faint blue glow emanates from within.
      *Blue glow. Father Ixtab is frozen in solid ice (no limbs, frostbitten and decrepit). His eyes flicker with intelligence. He is guarded by d6 rime-skinned zealots driven to prove their devotion. Ixtab demands to be worshipped (communicates telepathically).

    Secrets and Clues
    Details to be handed out as a reward for discovery. From the Captain’s logs, the characters’ own notes in crew quarters (8), other frightened passengers, newspaper clippings, etc.

    The crew of the Fogburner were infiltrated by members of an astral cult known as “the Children of Chalkuk.”

    Among the cargo from Bastion is an iron crate labelled “Ixtab.” The passengers report hearing whispers from it in the night.

    The passengers and crew report “lost time” and vivid dreams. Some have gone missing (presumably fallen overboard).

    “Ixtab” is the name of a man rescued years ago from the Polar Ocean. 

    Ixtab is a Priest of Chalkuk the Fallen Rime (an entity worshipped by astral cultists). Ice fallen from the stars.

    Ixtab spent his life searching for Chalkuk in the Polar Ocean. He has been gifted with psionic powers.

    Ixtab and his followers hijacked the Fogburner to find a frozen temple somewhere north of Hopesend.

    Each night when the characters sleep, their memories are erased by Ixtab’s psionic influence.

    The Children of Chalkuk have been mutated by the cold and Ixtab’s psionic resonance.

    The Captain sabotaged the engines to prevent the cultists from reaching their frozen temple.


    Wandering Encounters (d6)
    Roll d6, 1 = Encounter, 2 = Hint at Encounter

    (1) Frightened passenger. Driven to find resources.
    HP 4 | Pistol (d6) or Club (d6)

    (2) Rime-skinned Zealot. Driven to serve Father Ixtab.
    HP 8 | STR 12 | DEX 6 | WIL 8
    Claws (d8) or Icicle Spray (d4, Blast)
    *Frozen Solid! Advantage on Critical Damage Saves.

    (3) Frozen Husk. Driven to sap life from the living.
    HP 2 | STR 6 | DEX 4 | WIL 8
    Frozen Grip (d4 DEX damage) or Death Shatter (d6, Blast)*
    * Explodes! Frozen Husk is destroyed.

    (4) Ice Swarm. Driven to inflict pain on the unworthy.
    HP 8 | STR 4 | DEX 12 | WIL 2
    Slice (d6)
    *Swarm! Can attack up to three targets.

    (5) Psionic Cultist. Driven to bring nonbelievers to Ixtab.
    HP 4 | STR 8 | DEX 12 | WIL 12
    Psychic Sap (d4 WIL damage) or Pistol (d6)

    (6) The Engineer. Driven to preserve his creation forever.
    Armour 2 | HP 12 | STR 8 | DEX 12 | WIL 8
    Grab and Bite (d10) or Strangle (STR Save or Broken Neck)
    *Sticky! Can crawl on walls and ceilings.


    The Captain. Driven to defend the engines.
    HP 12 | STR 12 | DEX 8 | WIL 8
    Pistol (d6) and Flamethrower (d10, Blast)*
    *Immolated on Critical Damage!
    *Driven! Advantage on Critical Damage Saves

    Father Ixtab. Driven to be worshipped like Chalkuk.
    HP 1 | STR 3 | DEX 1 | WIL 18
    Psionic Blast (d8, Blast) and Psionic Domination (d4 WIL damage, head freezes at 0 WIL)
    *Frozen! Invulnerable while in solid ice.

  • I always thought I’d see a TPK coming from pretty far away. I thought there’d be time for me to think things through and understand what a party wipe will mean for the ongoing campaign. Will the players even want to keep going? Are they going to be invested enough in the world, the NPCs, and those tasty secrets and clues to make new characters and start over?

    During the 12th session of my *Ravenloft Campaign my players walked up to Baba Lysaga’s hut and confronted her face to face without much (any?) preparation.

    *A combination of I6 Ravenloft and 5e Curse of Strahd, using Shadowdark RPG and a densely packed hex rosette.

    Now, if you haven’t heard of Baba Lysaga that’s ok, the important thing to know is that my players had heard about Baba Lysaga. Virtually every single person they met in the misty valley of Barovia told them to stay as far away as possible, but the Priest (who could talk to animals and therefore understand the vivid cries of Baba’s captured ravens) insisted on being a hero.

    Before I knew it, all three PCs were stun-locked by screaming scarecrows and devoured by a magic swarm of insects in less than two rounds.

    It was surprising, memorable, and most importantly fun. Luckily, the amazing people I play with also thought it was fun (after an understandable period of shock and horror).

    It really changed my perspective on what a TPK can mean for a campaign. I called it the “season finale” and got to work hyping my players up for Season 2.

    Instead of turning to r/CurseofStrahd and asking how I can save my game, I looked inward and asked myself “what would make for the most interesting season premiere for the four of us as audience?”

    Lifting the hook from The Count, the Castle, and the Curse our second season begins with three new characters waking up in the dungeons of Ravenloft. I wanted to lean on the player’s own fear of the castle and subvert their expectations of it as a “final level” by throwing them into its deepest recesses and watching them flail to get out. It was awesome.

    Last night, my players returned to Baba Lysaga with new characters, allies, and a few more Level Ups than they had before. They heard stories about their fallen heroes, enough to give the new characters a believable reason to seek the same justice the players are after for themselves.

    The players planned well, but the battle remained tense throughout. In the end, with no casualties, Baba Lysaga was destroyed and the Ruins of Berez will finally be able to rest.

    “10/10.”
    – Late Priest player

  • I spent a few weeks this summer laboring over a hot MS Surface Pro drawing sci-fi themed, megadungeon chambers for what was supposed to be a very low-prep style of campaign.

    See, when I pitched the idea of a sci-fi campaign where the characters are stranded on an alien moon with no choice but to explore a reality-defying megadungeon, I thought it would be as simple as finding the right map and the right monsters and coming up with a few interesting gravity-themed traps.

    Well, it was hard to find the kind of sci-fi looking maps I wanted. I’m sure they are out there, somewhere, but the more I looked the more I became convinced for what I wanted to do I needed to draw my own.

    Originally I had planned to draw 60 dungeon tiles, 20 for each layer of a three-level megadungeon, but after designing the monsters and ecosystem of the first level I was convinced there was enough content for our summer of play.

    Unfortunately the campaign had to be called off after only two sessions, but I’m thankful I got to playtest the dungeon tiles and sci-fi ruleset based on Into the Odd.

    What I’m left with is an open-ended mystery, 20+ handcrafted modular dungeon tiles, and a set of rules for running Into the Odd in an Alien inspired setting.


    Overgrown Ruins | Into the Void
    Available on itch.io

  • A couple of weeks from now I’ll be running the Hideous Halls of Mugulblub by Kelsey Dionne for my Open Table (see: The Alexandrian). This dungeon will introduce players to the Gloaming and launch a short nine-session campaign.

    I love poring over hand-drawn, thoughtfully detailed maps like the one Kelsey drew for this adventure; the old-school, graph paper, Dyson Logos vibe is beautiful in its own right and very popular for good reason. Still, I’ve always struggled to turn my nacho-stained two-dimensional map into a living, three-dimensional space players can immerse themselves in.

    “That’s a lot of doors…”

    – Dwarf Fighter entering Death House for the first time

    For the last year or more, my solution was to just give my players a copy of the map, often early in the adventure as a reward for discovery, but sometimes from the start with no in-universe explanation other than “this is what y’all can see.” I’ve never regretted this decision, but I’ve often wondered if there isn’t a better way to condense a dungeon to its most essential decisions while preserving the core fantasy of stumbling around in absolute darkness.

    After reading and playing a little bit of Mythic Bastionland this summer I was inspired to take a second look at designer Chris McDowall’s previous masterpiece, Electric Bastionland. As a book, I love my copy of Electric Bastionland, but I’ll admit even after a couple of years of owning it I haven’t actually played it earnest, usually preferring to run pre-published adventures using its foundational rule set, Into the Odd.

    “The exact geography of Bastion’s streets is less important than the main routes between key points.”

    – Chris McDowall, Electric Bastionland

    This time, however, something about the simplicity of McDowall’s borough rules helped me understand intuitively how I could run a dungeon like Bittermold Keep as a series of interconnected routes and key points, focusing on decisions and movement, rather than strict three-dimensional understanding.

    The goal was to fit as much of my notes directly onto the map as I can and use the physical zine at the table to describe each key point. The routes need to be different enough that there is a meaningful decision to make at each key location.

    We’ll see how it goes.